 Skip to content
Let’s be honest for a second.
When you are planning a new FTTH (Fiber to the Home) project, what takes up 90% of your attention?
It’s usually the big-ticket items. You worry about the OLT compatibility. You spend weeks negotiating the price of the fiber optic cable per kilometer. You argue about the labor costs for the deployment teams.
And somewhere, at the very bottom of the Excel sheet, there is a small line item for Cable Clamps.
Most people just pick the cheapest one. “It’s just a piece of plastic and metal,” they say. “How much difference can it make?”
If you have been in this industry for more than a few years, you know the answer: It makes all the difference.
I’ve seen entire network sectors go dark after a bad storm, not because the fiber broke, but because the cheap clamps gave up. I’ve seen operation directors pulling their hair out because their maintenance teams are doing 50 truck rolls a week just to re-attach drop cables.
Today, I want to talk about this often-ignored hero of the passive optical network. We are going to look at how to choose the right fiber cable clamp, why they fail, and how to save thousands of dollars in future maintenance by spending just a few cents more upfront.
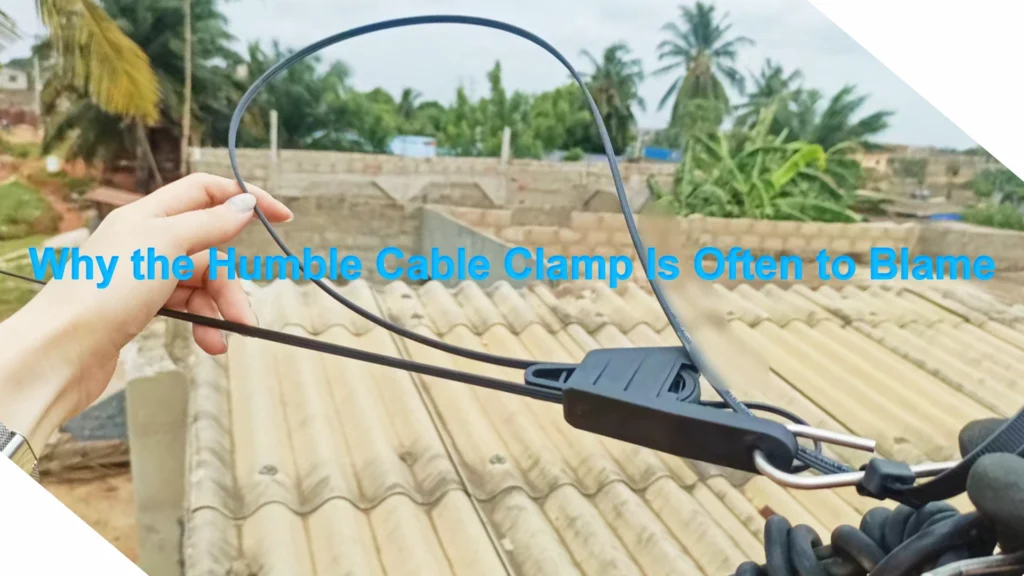
The “Invisible” Job of a Fiber Optic Cable Clamp
To understand why these fail, we have to look at what we are actually asking this little device to do.
A fiber optic cable clamp (often called a Drop Wire Clamp or Tension Clamp) has a deceptively simple job: hold the cable tight. But in reality, it is fighting a constant battle against physics.
Unlike copper cables, fiber is sensitive. It hates two things:
- Macro-bending (bending too tight, causing signal loss).
- Axial tension (stretching, which can crack the glass core).
A good clamp needs to grip the cable jacket firmly enough to hold it up against gravity, wind, and ice load, but gently enough not to crush the fiber inside. It’s a delicate balance.
If you use a generic clamp for cable management that was designed for copper telephone wires, you might crush the fiber buffer. If you use a cheap plastic clamp, UV radiation might make it brittle in six months, causing it to snap the moment the wind blows.
The 3 Most Common Reasons Clamps Fail (Real World Scenarios)
In our experience supplying ISPs and contractors, when a customer complains about “bad cable,” it’s almost never the cable. It’s the installation accessories. Here is what usually goes wrong.
1. The “Slip” Effect
You install the line in summer. It’s 35°C. The cable jacket is soft. The optic cable clamp bites in nicely. Six months later, it’s winter. The temperature drops to -5°C. The cable jacket contracts and hardens. The plastic of the clamp body also shrinks, but at a different rate. Suddenly, the grip loosens. A strong wind hits the line, the cable slips through the wedge, pulls on the connector at the distribution box, and snap. Signal lost.
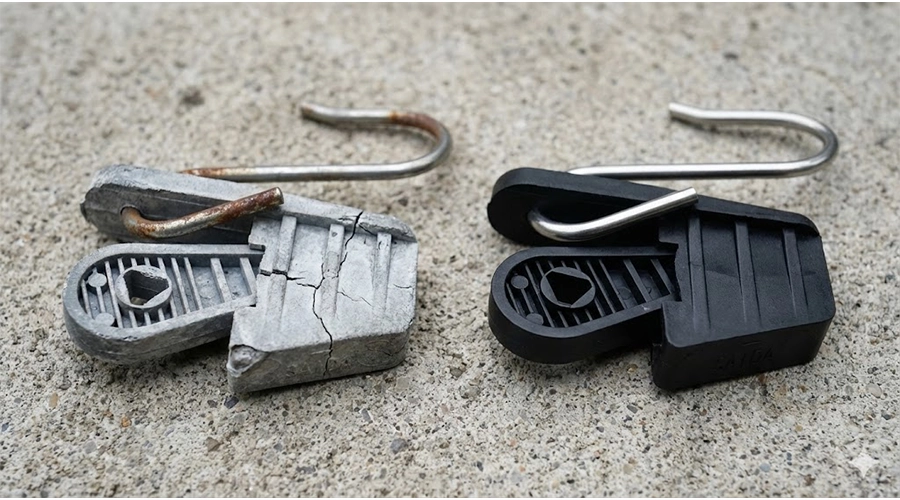
2. UV Degradation (The Silent Killer)
This is the number one issue with cheap products. A fresh, black plastic clamp looks great out of the box. But if the manufacturer used recycled plastic or didn’t add enough Carbon Black (UV stabilizer), the sun will eat it alive. We have seen clamps that literally crumble into powder when you touch them after two years of exposure. If you are building a network that is supposed to last 20 years, why buy a clamp that lasts two?
3. The Wrong Wedge for the Wrong Cable
Not all drop cables are the same. You have flat cables (butterfly), round cables, figure-8 cables. I’ve seen technicians trying to force a flat drop cable into a fiber cable clamp designed for round cables. They hammer the wedge in to make it fit. It holds for a week, but the pressure point is all wrong. Eventually, the attenuation (signal loss) goes up, and you have a customer complaining about slow internet speeds.
Anatomy of a High-Quality Clamp: What to Look For
So, how do you spot a good one? You don’t need a laboratory; you just need to know what to check.
When we evaluate Clamps for cable tensioning, we look at three main components.
The Material (The Secret Sauce)
This is where the price difference comes from.
- The Cheap Clamp: Often made of generic ABS or recycled PP (Polypropylene). It feels hard and brittle. If you drop it on concrete, it sounds like a high-pitched crack.
- The Good Clamp: Usually UV-resistant PA66 (Nylon 66) reinforced with fiberglass. It feels denser. If you drop it, it makes a dull thud.
Why PA66? It has high mechanical strength and excellent heat resistance. When you add fiberglass, it becomes incredibly stiff and durable. It doesn’t deform under the summer heat.
The Shim / Wedge Design
The magic of a good fiber optic cable clamp is in the wedge mechanism. It should be “self-adjusting.” As the tension on the cable increases (like when wind blows), the wedge should be pulled tighter into the shell, increasing the grip.
- Check the teeth: Look at the teeth or bumps inside the wedge. They should be prominent enough to grab the cable jacket but rounded enough not to puncture it. Sharp teeth are a no-go for fiber optics.
The Bail (The Wire Loop)
The metal hook or bail connects the clamp to the bracket on the pole.
- Stainless Steel vs. Galvanized: Stainless steel (SS201 or SS304) is always better. Galvanized wire will eventually rust, especially near the coast. Once it rusts, it gets rough and can cut through the plastic body of the clamp.
A Technical Comparison: Choosing Based on Cable Type
I know it can be confusing with so many models out there. Let me break down the standard options we usually see in the field.
| Clamp Style | Best For | Pros | Cons |
|---|---|---|---|
| S-Type (Fish Clamp) | Flat Drop Cable (Butterfly) | Very cheap, easy to install, no tools needed. | Limited tension load. Not good for long spans (>50m). |
| Wedge Type (Plastic) | Round or Flat Cables (Universal) | Excellent tension hold. Self-tightening. Re-usable. | Slightly more expensive than S-Type. Requires correct size matching. |
| Spiral / Helical | ADSS / Round Cable | Best protection for fiber. Distributes grip over a long area. | Expensive. Installation takes longer. |
The “Hidden” ROI of Buying Better Clamps
I talk to purchasing managers all the time who say, “I can get this cable clamp for $0.15, why are you selling yours for $0.25?”
It’s a fair question. But let’s do the math on a small network deployment of 1,000 homes.
Scenario A: The Cheap Clamp
- Cost of clamps: $150.
- Failure rate over 2 years: 5% (conservative estimate).
- That’s 50 failures.
- Cost of a truck roll (technician, fuel, time) to fix one line: let’s say $50 (very low estimate).
- Total Repair Cost: $2,500.
Scenario B: The Quality Clamp
- Cost of clamps: $250.
- Failure rate over 2 years: 0.1%.
- That’s 1 failure.
- Total Repair Cost: $50.
By saving $100 on the initial purchase, you cost the company $2,450 in maintenance. And that doesn’t even count the reputational damage of angry customers cancelling their service because “the internet is always down.”
When you look at it this way, the “expensive” optic cable clamp is actually the cheapest option by far.
Installation Advice: Don’t Blame the Tool if the User is Wrong
Even the best fiber cable clamp in the world will fail if your team installs it wrong. Here are a few quick tips I always tell construction teams:
- Respect the Span: Every clamp has a “Max Span” rating (e.g., 50 meters, 80 meters). This rating is based on the weight of the cable and potential wind load. Don’t try to stretch a drop cable 100 meters between poles using a clamp rated for 40 meters. It will sag, and it will break.
- Leave a Loop: Always leave a small service loop (slack) before the clamp. This prevents water from running down the cable and straight into the clamp or the closure. It also gives you some extra cable if you need to re-terminate later.
- Don’t Over-tighten (Manually): The wedge is designed to tighten itself with the cable tension. You don’t need to hammer it in. Hand-tight is usually enough to start, and gravity will do the rest.
How to Test a Clamp Without a Lab
You might be thinking, “Okay, but I can’t verify the chemical composition of the plastic.” True. But you can do some simple field tests.
The Bend Test: Take the plastic bail or the body of the clamp. Try to bend it.
- If it turns white immediately at the stress point (stress whitening), it might have too much filler (chalk) in the plastic.
- If it snaps instantly, it’s too brittle.
- A good nylon clamp should have some flex and “memory” – it wants to return to its original shape.
The Tooth Test: Rub your finger over the gripping teeth inside the clamp.
- If they feel sharp like a knife, they will damage your cable jacket.
- They should feel defined but slightly dull.
Build It Once, Build It Right
In the B2B world, we often get caught up in specs and spreadsheets. But at the end of the day, an FTTH network is physical infrastructure. It sits out in the rain, the snow, and the burning sun, 24/7.
The Cable Clamp is the hand that holds your network together. If that hand gets tired, weak, or breaks, the data stops flowing.
If you are currently sourcing accessories for a project, or if you are tired of replacing rusted, broken clamps every winter, maybe it’s time to re-evaluate what you are buying.
We have spent years testing different materials and designs to find the sweet spot between cost and extreme durability. We know what works in the freezing winters of Russia and the humid heat of Southeast Asia.
If you’re not sure which clamp fits your specific cable type, let’s talk.
We can send you a few samples of our different fiber optic cable clamp models. You can install them, leave them outside, pull them, and see the difference for yourself.
Sometimes, holding the product in your hand tells you more than a thousand datasheets ever could.

